Industrial Pump Repair Canada - Pump and Seal Repair and Replacement Services
ISO 9001 Certified

Industrial Pump Repair Canada - Pump and Seal Repair and Replacement Services
ISO 9001 Certified
Choosing the right pump repair solutions starts with the failure, not the sales pitch. A pump that rattles, runs hot, or leaks at the seal may need very different attention. The visible symptom is only a clue. Check operating conditions, maintenance history, and manufacturer tolerances before approving work. Small details matter.
For transparency, the quotation below is an illustrative line from fictional pump reliability engineer Alex Morgan, not a verified statement by a real person: “A durable repair begins with a clear diagnosis, not a quick parts swap.” That principle can guide your review of repair providers. Ask how they inspect bearings, measure shaft wear, and test the unit after assembly. Request a written scope, parts details, expected turnaround, and warranty terms. A confident promise without inspection deserves a second look.
This guide explains how to compare repair methods, provider experience, cost, and turnaround without losing sight of reliability. It also considers when replacement may make more sense than repair. A repaired pump can look ready on the bench, yet fail again under heat, pressure, or abrasive fluid. That happens. Use documented findings and operating data to judge the recommendation, and keep room for uncertainty when the evidence is incomplete. The best pump repair solutions fit the pump’s duty, site conditions, and maintenance goals—not just the lowest estimate.
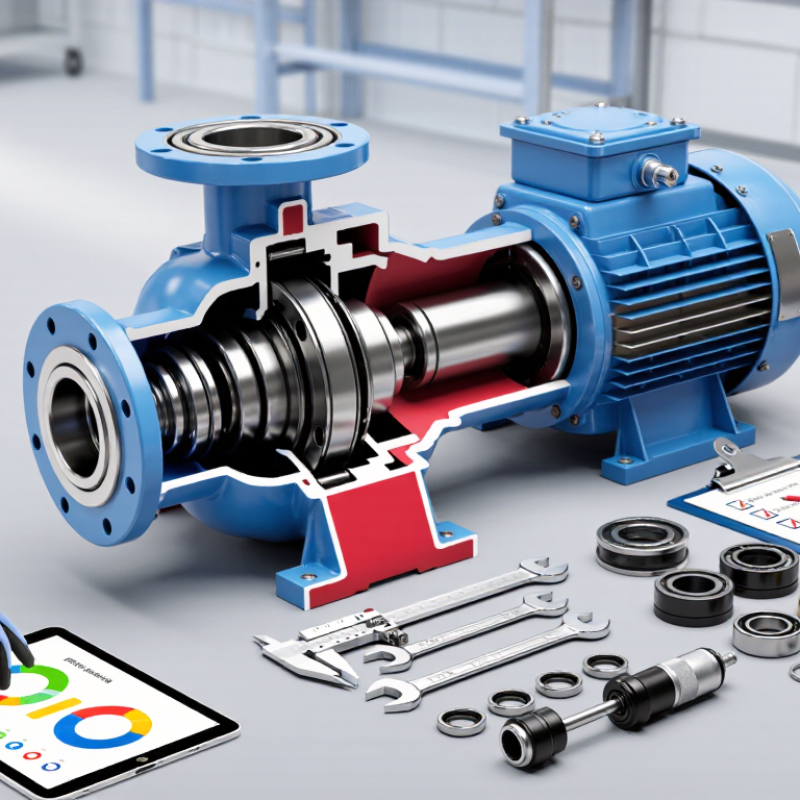
Before choosing a repair, record how the pump behaves under normal operating conditions. Note its flow rate, discharge pressure, motor current, and bearing temperature. Then compare current readings with maintenance logs or the original commissioning data. A gradual pressure drop may indicate wear or blockage, while a sudden change deserves prompt inspection. Listen closely. Grinding, rattling, or a sharp hiss can point to bearing damage, loose components, or cavitation, but sound alone cannot confirm the cause.
Check for visible leakage around seals and joints, unusual vibration, and hot spots on the casing. A handheld vibration meter and infrared thermometer can help turn vague observations into measurable evidence. One reading is not enough. Repeat measurements under similar conditions, and inspect suction strainers and piping before assuming the pump itself has failed. The U.S. Department of Energy’s Improving Pumping System Performance: A Sourcebook for Industry reports that pumping systems account for nearly 20% of global electricity demand. That scale makes early diagnosis valuable, but energy use alone does not prove a pump is defective. Even experienced teams can misread symptoms when operating conditions have changed; note the uncertainty and investigate it.
| Condition Check | Typical Failure Symptoms | What to Inspect or Measure | Possible Cause | Suggested Repair Solution | Priority |
|---|---|---|---|---|---|
| Flow rate and discharge pressure | Flow or pressure is lower than the pump’s normal operating level; delivery may fluctuate. | Compare flow and suction/discharge pressure with commissioning records or the pump’s operating curve. Check valve positions and the system for restrictions. | Clogged strainer or impeller, closed or partly closed valve, air entering the suction line, or excessive system resistance. | Clear obstructions, correct valve settings, repair suction-line leaks, and confirm the pump is operating near its intended duty point. | High if the pump cannot meet process demand; otherwise schedule inspection promptly. |
| Vibration and noise | New or increasing vibration, rattling, grinding, or a harsh mechanical sound. | Record vibration at consistent locations and compare readings with the machine’s baseline and applicable manufacturer or site limits. Check alignment, mounting, and pipe support. | Misalignment, looseness, imbalance, bearing wear, cavitation, or pipe strain. | Correct alignment and loose fasteners, address pipe strain, and inspect the impeller and bearings if vibration remains elevated. | High; stop the pump if vibration is severe or rapidly worsening. |
| Bearing temperature and lubrication | Bearing housing runs hotter than its normal baseline, or grease/oil appears discolored, contaminated, or depleted. | Trend temperature under comparable operating conditions. Check lubricant type, level, condition, and lubrication interval against the equipment instructions. | Insufficient or excessive lubrication, contamination, bearing damage, or misalignment. | Correct the lubrication condition using the specified lubricant and quantity; replace damaged bearings and verify alignment. | High if temperature continues to rise or the bearing makes abnormal noise. |
| Seal area and leakage | Visible leakage, spray, or residue around the shaft seal or packing gland. | Identify the leak location and rate, inspect the seal area, and check for shaft movement or dry-running evidence. Follow site procedures for the pumped fluid. | Worn seal faces or packing, damaged elastomers, shaft-sleeve wear, or unsuitable operating conditions. | Replace or adjust the sealing components as appropriate; inspect the shaft sleeve and correct any cause of dry running or excessive vibration. | Immediate for hazardous, hot, or pressurized fluids; otherwise assess against the permitted leakage limit. |
| Motor current and pump load | Motor current differs noticeably from its normal value; overload trips or unexpected power changes occur. | Check current on all phases and compare with the motor nameplate and normal operating records. Verify voltage, phase balance, and pump operating conditions. | Electrical supply problem, overload, binding, incorrect rotation, or operation outside the intended duty range. | Correct electrical or rotation issues, check for mechanical binding, and confirm the pump and system are matched to the required duty. | Urgent if protective devices trip repeatedly or current exceeds the equipment rating. |
| Suction conditions and priming | Unsteady discharge, loss of prime, popping or crackling sounds, or fluctuating pressure. | Check liquid level, suction pressure, suction-line leaks, strainer condition, and whether the pump is fully primed. Compare suction conditions with the pump’s requirements. | Insufficient suction head, air ingress, blocked suction line, excessive fluid temperature, or cavitation. | Restore adequate liquid supply, seal suction leaks, clean restrictions, and correct suction piping or operating conditions before restarting. | High; continued cavitation or dry running can damage internal components. |
Assessment note: Use the pump’s operating manual, baseline readings, fluid hazards, and site safety procedures when selecting a repair. Symptoms can have multiple causes, so confirm the fault before replacing components.
Choosing a pump repair solution starts with defining the failure, not requesting a price for parts. Record operating flow, discharge pressure, motor current, vibration, and recent changes in noise or temperature. A pump that cannot meet duty may have worn clearances, a blocked suction line, or a system-control problem. Those causes need different work. A seal leak alone may call for a focused repair; repeated bearing damage may point to misalignment or piping strain. Look closely.
The U.S. Department of Energy’s Improving Pumping System Performance: A Sourcebook for Industry reports that pumping systems account for nearly 20% of global electricity demand, and 25–50% of energy use in some industrial plants. That makes repair scope an operating-cost decision, too. Ask whether the assessment includes shaft and bearing checks, impeller inspection, alignment, and a post-repair performance test. Match the job to technicians with experience in the pump type and failure mode, plus suitable measurement tools. A teardown can reveal damage that initial checks miss, so early estimates are not always final. That uncertainty should be stated plainly. Request measurements and findings, not just a parts list, and compare the proposed repair with the pump’s actual duty and maintenance history.
This planning rubric compares common pump repair scopes by the technical expertise they typically require. Scores are qualitative, not measured industry statistics: 1 = basic, 5 = advanced. Confirm the scope against the pump design, manufacturer requirements, and site conditions.
Choosing a pump repair method starts with the failure, not the price tag. A seal leak may need a seal and shaft inspection, while vibration can point to misalignment, worn bearings, or an unbalanced impeller. A qualified technician should inspect the pump, review its service history, and test it under realistic operating conditions. Ask for measurements, not just a verbal diagnosis. A quick fix may restore flow, but it can leave the cause untouched. That matters.
Compare providers by their diagnostic process, repair scope, parts quality, and workmanship warranty. Request a written estimate that separates labor, parts, testing, and likely downtime. Check whether the shop can handle your pump type and provide a test report after repair. Replacement may make more sense when the casing is badly damaged, parts are unavailable, or repeated repairs cost more than the expected service life justifies. Not always. Compare energy use, installation changes, and the cost of lost production, too. A new pump is not automatically the safer choice; an older unit may still be dependable after a documented repair. It is easy to overvalue a low quote, and I would reconsider any estimate that skips inspection or promises results without explaining the evidence.
Choosing a pump repair solution starts with the parts, not just the quote. Ask whether replacement components match the pump’s material, dimensions, and operating conditions. A seal that looks right on a bench may fail when exposed to heat or abrasive fluid. Request inspection findings, including wear measurements and photos of damaged areas. Small details matter. If the shop cannot explain why a part needs replacement, ask for a clearer explanation before approving the work.
Compare the full cost, not only the labor rate. A useful estimate separates parts, machining, testing, and any uncertain work. Ask what could change the price after disassembly. A low quote can feel reassuring, but it may exclude balancing or final performance checks. Repair is not always the cheaper long-term choice, either; repeated seal or bearing failures may point to a deeper alignment or operating issue. The evidence can be imperfect, so keep the decision tied to documented findings.
Turnaround matters when a pump supports a production line or building system. Get a realistic schedule that includes parts availability, repair time, and testing. Ask what inspection or test results will be shared before the unit returns. A quick repair without a documented run test may create another shutdown. Time is part of cost. A short delay for proper testing can be worthwhile, though every operation has its own limit.
Before approving a pump repair, ask how the unit will be tested after reassembly. A useful report should record flow, discharge pressure, motor current, and vibration under stated operating conditions. Test results matter more than a simple “passed” note. For example, a pump may sound smooth on a bench but behave differently when connected to long pipework. Ask whether the test setup reflects your system’s speed, fluid, and expected load. Keep the readings with the repair record. They give technicians a baseline for future checks.
Review warranty coverage in writing. Confirm which parts and labor are included, how long coverage lasts, and what operating conditions could void it. A warranty may not cover damage caused by dry running or blocked intake lines. That detail is easy to miss.
No checklist catches everything, so clarify unclear terms before authorizing work. Then discuss maintenance needs with the repair provider. Ask for practical intervals for seal inspection, lubrication, alignment, and vibration checks, based on your pump’s duty cycle. Record unusual noise, leaks, or rising temperatures between visits. A neat schedule helps, but actual operating conditions can change; revise it when the pump’s workload does.